Connect Me
This chapter describes the initial steps to start using your Shieldoo Secure Network:
- Login to Shieldoo Web Application
- Download & Install Shieldoo Client
- Connect to Shieldoo Secure Network
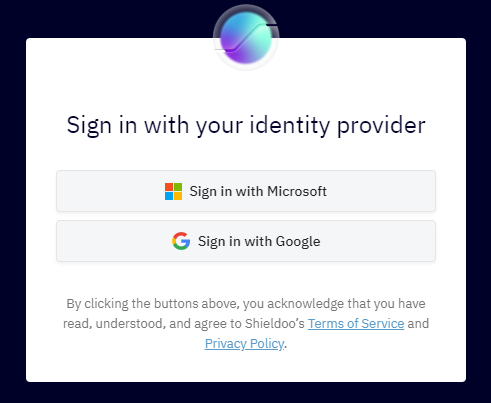
Login to Shieldoo Web Application
When your Shieldoo Secure Network was successfully created, and you were notified via email, this is the initial page requesting to log in using your existing Microsoft or Google account.
After successful login to the Shieldoo web application, the user information is shown in the upper right corner (user name, type of user and icon).
By clicking on the arrow icon, it is possible to check My Account details or to Sign Out from the site.

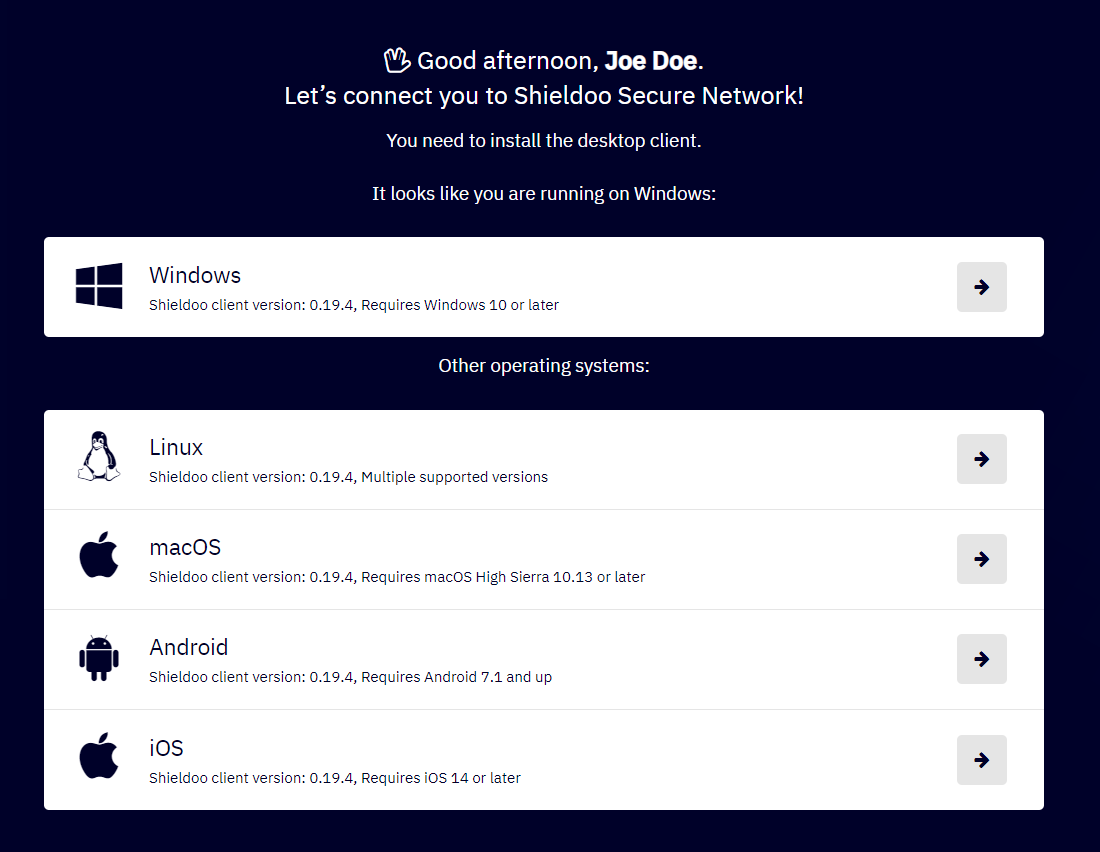
Download & Install Shieldoo Client
The following steps describe how to download and install the Shieldoo client:
Go to the Connect Me | Download & Install section.

Choose the download link according to your operating system and click the arrow.
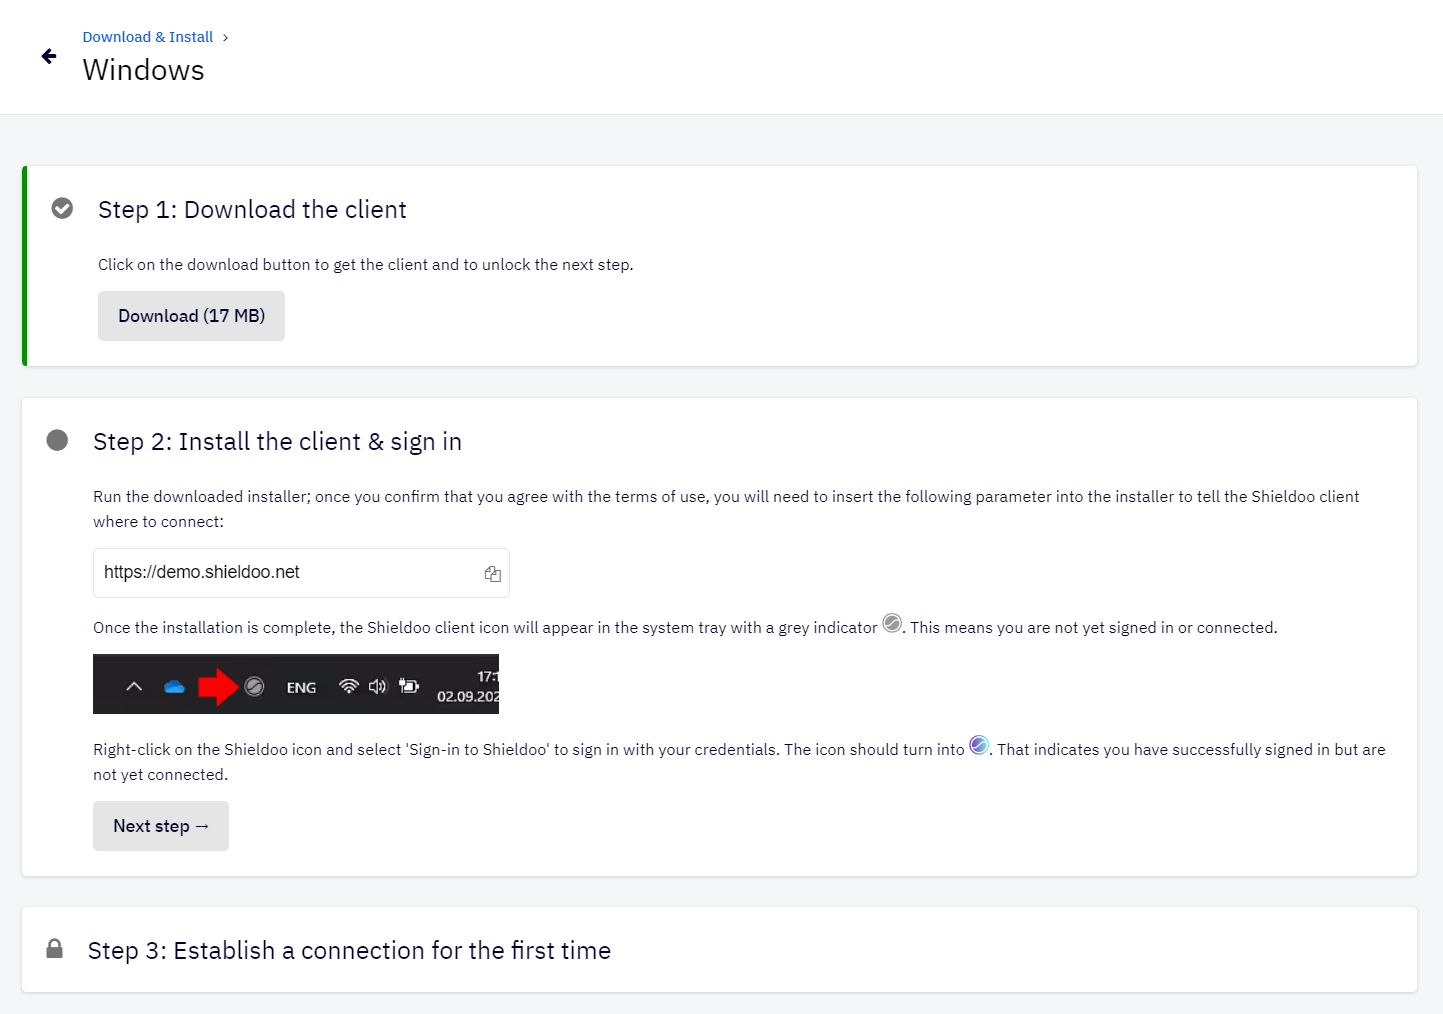
Download the client by clicking the Download button.

Install the client according to the well-guiding instructions.
Connect to Shieldoo Secure Network
This section describes establishing a secure connection to a server and attached services in Shieldoo Secure Network:
Servers are devices to which users or other servers can connect.
Attached Services are located on devices that run on the local network of a server, but where Shieldoo cannot be installed (e.g. a printer). Shieldoo lets you directly connect to such services (a device port is mapped to a server port). Your admin of Shieldoo Secure Network manages these services.
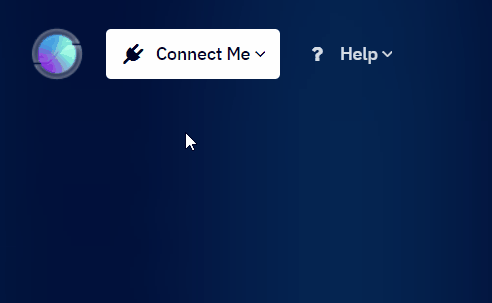
Connect to Network
After successfully downloading and installing the Shieldoo client, you can now connect to Shieldoo Secure Network.
The following steps describe how to connect via Shieldoo client:
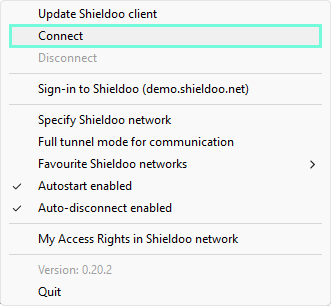
Click on the Shieldoo client icon in the system tray.

Click on the Sign-in option and log in with the same credentials you used to log in to the Shieldoo web application.
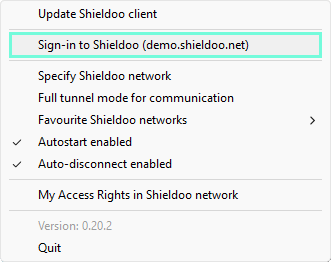
Click on the Connect option and connect to the network.
After successfully connecting to the Shieldoo Secure Network, you can securely connect to any server and attached services in the network.
The Shieldoo client icon in the system tray provides visual aid about its current status:
- Not Sign-in and Not Connect
- Sign-in and Not Connect
- Sign-in and Connect


The Shieldoo client includes additional options:
- Update Shieldoo Client - If a new client version is available, you can update it using this option.
- Disconnect - Use this option to disconnect from the network without losing your login credentials.
- Specify Shieldoo network - Use this option to change the network URL parameter.
- Enabled Full tunnel mode for communication - The use option allows the feature of an anonymous VPN (you are masked on the Internet under the Lighthouse IP address).
- Favorite Shieldoo Networks - Use this option to save a list of your networks and switch between them.
- Enabled Autostart - The use option allows the client to start automatically when the OS boots.
- Enabled Auto-disconnect - The use option allows you to save costs because, after 20 minutes of inactivity to connect to any server or access service, the client will automatically disconnect from the network.
- My access rights on the Shieldoo network - Use this option to redirect to a list of my access rights.
- Version - Displays the currently installed version of the client.
- Exit - Use this option to exit the client.
Connect to Servers
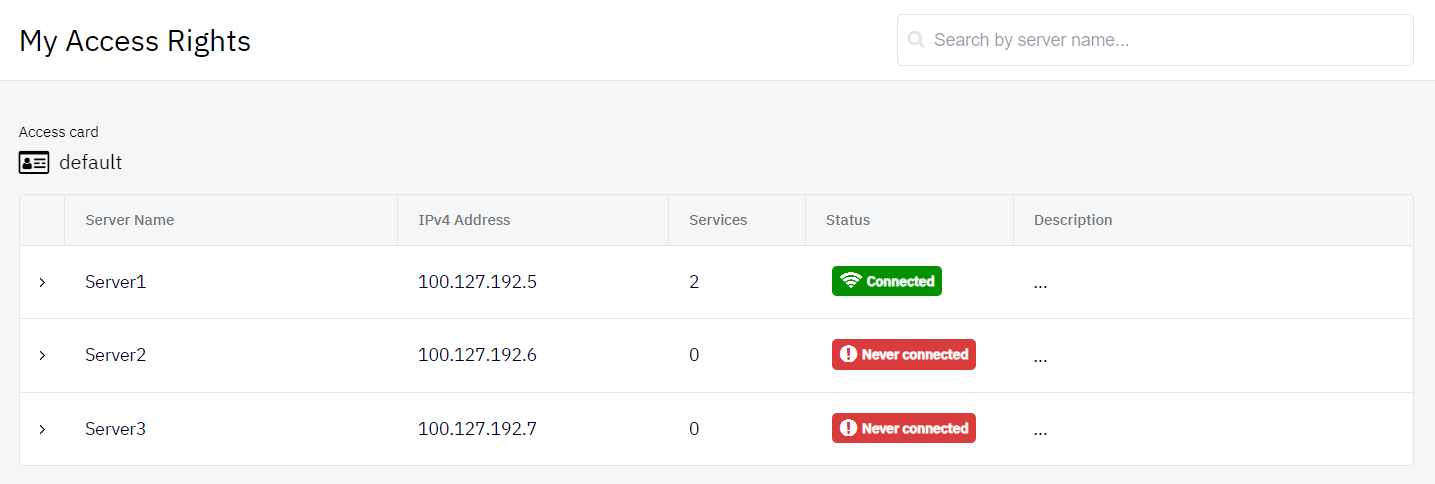
To see the list of available servers, go to Connect Me | My Access Rights in the Shieldoo web application.
It will show the list of available servers with information about their names, IP addresses and descriptions. In the description, your admin tells you what a particular server is for and how to connect to it.
Connect to Attached Services
The method of connecting to an attached service depends on the type of the given service. The general procedure is described below.
To see the list of available attached services, go to Connect Me | My Access Rights in the Shieldoo web application.
It will show the list of available servers. Then expand the row of a server with any attached services configured and connect to an attached service by utilizing the given attached service’s IP address and the attached service’s port. In the descriptions, your admi will tell you what a particular attached service is for and how to connect to it.
For specific instructions on how to set such a service, see the Attached Services section.