Servers
Servers in a Shieldoo Secure Network are devices to which users or other servers can connect.
Create & Install Servers
The following steps describe how to install a server in your Shieldoo Secure Network:
- Go to the machine you want to install the server.
- Log in to your organization’s Shieldoo Secure Network web application.
- Go to the Network | Servers section.
- Click on the Create button to open the Create Server dialog.
- Configure the basic server settings:
- Name - Give the server a descriptive name.
- Note - Describe the server’s purpose.
- Automatic Shieldoo update - Enables automatic Shieldoo server-side application updates to the latest version.
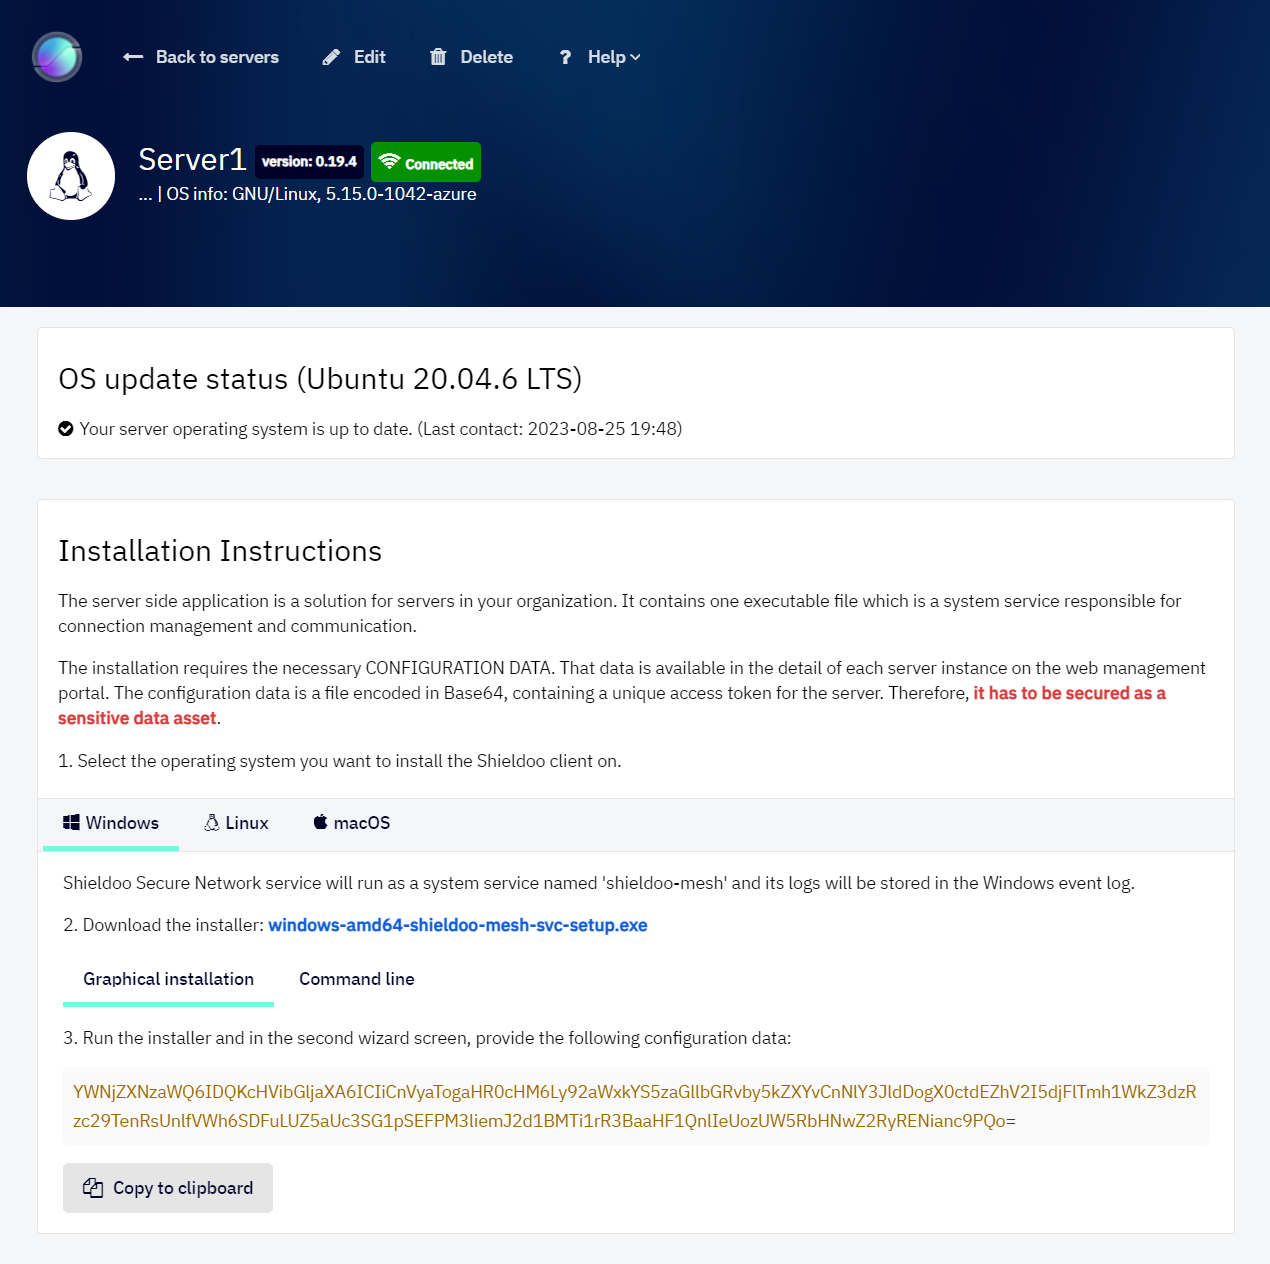
- Click the Create button again to open the installation instructions.
- Follow the installation instructions to install the server-side Shieldoo Secure Network application on the machine.
- Learn how to connect to the prepared server in the Connect Me chapter.
- The configuration data (provided by the installation instructions) contains the secret key to your server. Do not share it with anyone to prevent unauthorized users from exploiting it.
- By default, each server allows any inbound and outbound traffic. You can configure a firewall to restrict access to the services running on the given server. Learn how to do that in the Access Management chapter.
If you create and install the server in Admin | Expert mode, you can also configure and use the following features:
Editing Servers
This section describes how to edit a server’s configuration after it has been created.
- Go to the Network | Servers section.
Open the context menu of the server whose configuration you want to edit:
- Use the provided options to edit the server:
- Detail - Open the current information about the server and the installation instructions you used to install the server.
- Edit - Open the server’s configuration, which you can edit.
- Delete - Deletes the server from your Shieldoo Secure Network. No users or other servers will be able to connect to it and its configuration will be forever lost.
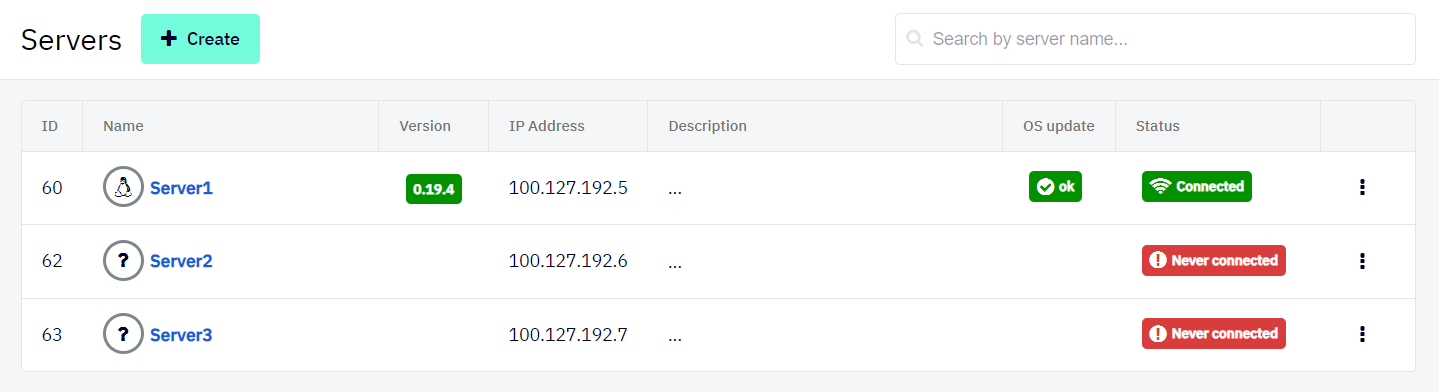
Status Servers
The icons in the list of servers in the Network | Servers section provide visual information about the current server status:
 The server has never been connected to the network, and other enabled nodes (users and servers) cannot connect to this server. The server may not have been installed yet.
 The server is connected to the network in Peer-to-Peer mode or Relay mode, and other enabled nodes (users and servers) can connect to this server.
 The server is connected to the network in Websocket mode, and other enabled nodes (users and servers) can connect to this server.
 The server is not connected to the network, and other enabled nodes (users and servers) can not connect to this server because of a network connection problem.
 The server is not connected to the network, and other enabled nodes (users and servers) can not connect to this server. The server will need to be turned on, woken up or restarted.
The current status for a specific server is also displayed in greater detail in the Server Detail section:
- Go to the Network | Servers section.
- Open the context menu of the server whose configuration you want to edit.
- Click on Detail to open the current information about the specific server.
Automatic OS updates
This section describes how to use Automatic OS updates of the servers.
Shieldoo Secure Network supports automatic OS updates, bringing simplified management to your IT infrastructure. With the introduction of this functionality, administrators can now manage servers more efficiently.
With Shieldoo Secure Network, administrators can monitor the status of updates for all supported OS, i.e. Windows, Linux and MacOS.

Additionally, administrators can apply OS and security updates for Linux OS, simplifying their daily operations and increasing overall efficiency.
Configuring Automatic OS updates
- Enable Expert Mode.
- See the Access Management chapter to learn how to enable Expert Mode.
- Go to the Network | Servers section.
- Open the context menu of the server whose configuration you want to edit.
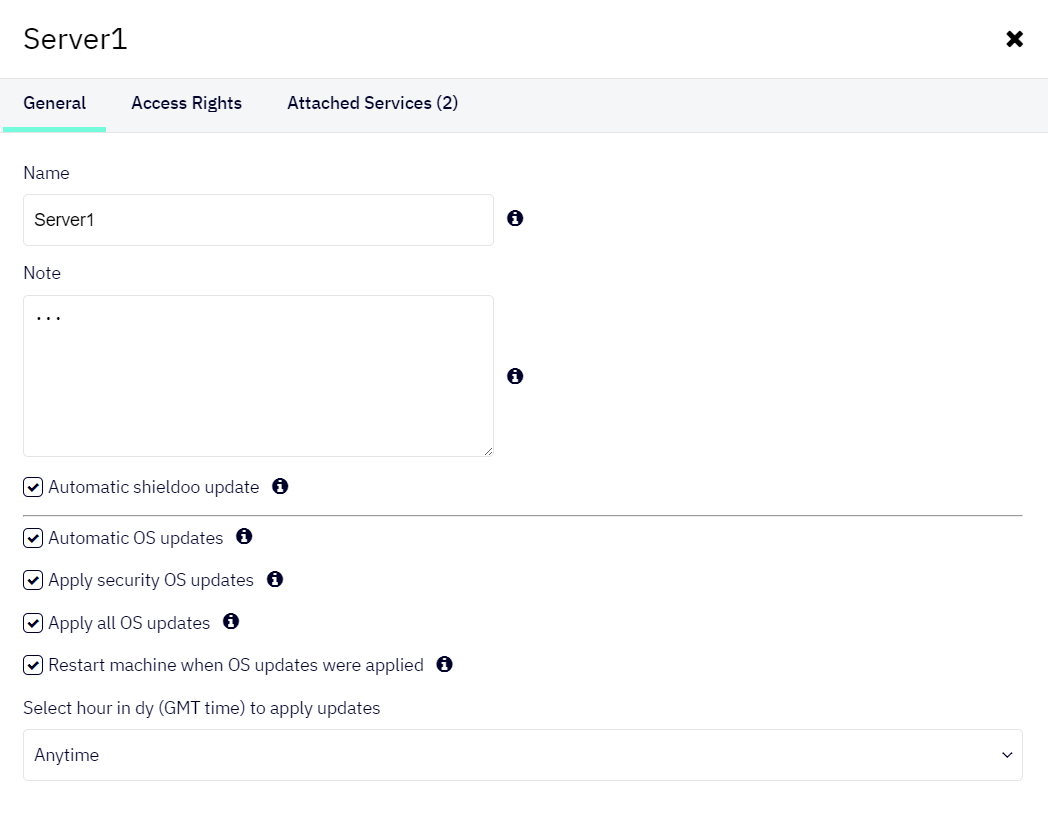
- Click on Edit to open the server’s settings.
- Go to the General tab.
- Configure the Automatic OS update settings:
- Automatic OS update (Windows, Linux, MacOs) - Enables automatic updates on the OS level. This option will start collecting data about updates. This means that you must apply update yourself.
- Apply security OS updates (only Linux) - Enables automatic security updates on OS level (will be applied).
- Apply all OS updates (only Linux) - Enables all automatic updates on OS level (will be applied).
- Restart the machine when OS updates were applied (only Linux).
- Select an hour in the day to apply updates (only Linux).
Status Automatic OS updates
The icons in the list of servers in the Network | Servers section provide visual information about the current status of the automatic OS updates:
 - The server operating system is up to date.
 - The server operating system needs updates (Security updates: 37).
 - The server operating system needs updates (Other updates: 8).
 - The update process failed with an error.
The current status of automatic OS updates for a specific server is also displayed in greater detail in the Server Detail section:
- Go to the Network | Servers section.
- Open the context menu of the server whose configuration you want to edit.
- Click on Detail to open the current information about the specific server.
Access Rights
This section describes how to configure and manage the Access Rights of the servers. For more information, see the Access Management chapter.
Configuring Access Rights
The following steps describe how to configure Access Rights of the servers:
- Enable Expert Mode.
- See the Access Management chapter to learn how to enable Expert Mode.
- Go to the Network | Servers section.
- Open the context menu of the server whose configuration you want to edit.
- Click on Edit to open the server’s settings.
- Go to the Access Rights tab.
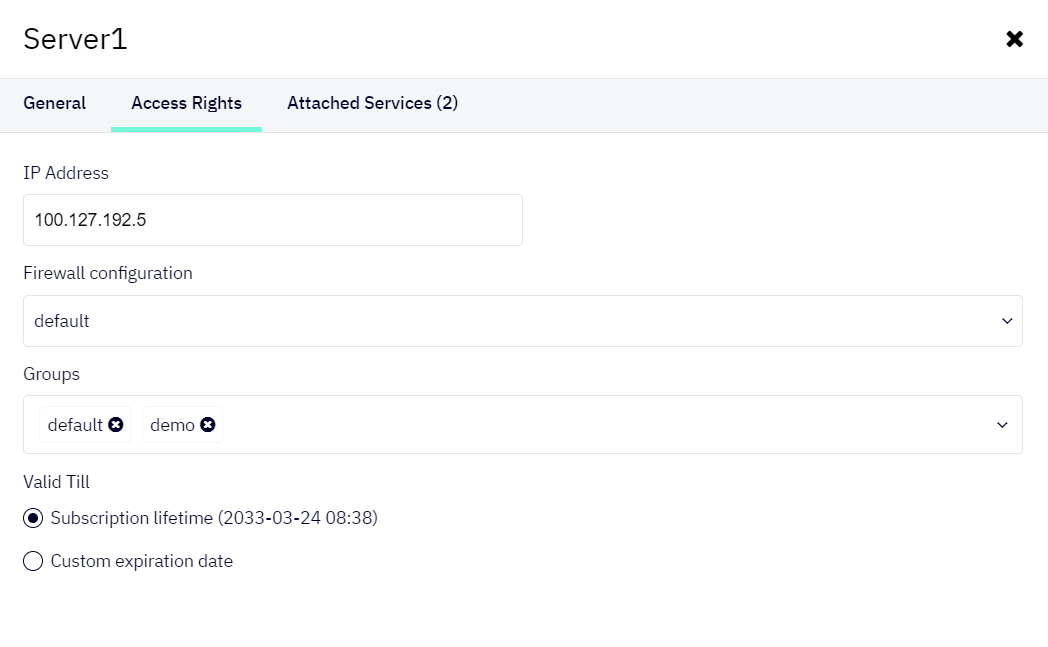
- Configure the access right settings:
- IP Address - Skip this setting unless the IP address of the given server has changed since you created it.
- Firewall configuration - Select one of the prepared firewalls.
- Groups - Map the server with all the desired groups.
- Valid Till - Define how long the access right will remain valid:
- Subscription lifetime - Defines that the access right will remain valid if your organisation subscribes to Shieldoo Secure Network.
- Custom expiration date - Defines a custom expiration using the provided date picker.
- Click the Save button to confirm the access right creation.
Attached Services
This section describes how to use the Attached Services of the servers.
Attached Services are located on devices that run on the local network of a server but where Shieldoo cannot be installed (e.g. a printer). Shieldoo lets you directly connect to such services (a device port is mapped to a server port).
Configuring Attached Services
The following steps describe how to configure a connection to an attached service:
- Enable Expert Mode.
- See the Access Management chapter to learn how to enable Expert Mode.
- Go to the Network | Servers section.
- Open the context menu of the server whose configuration you want to edit.
- Click on Edit to open the server’s settings.
- Go to the Attached Services tab.
- Click on the Create button to open the Create Attached Service dialog.
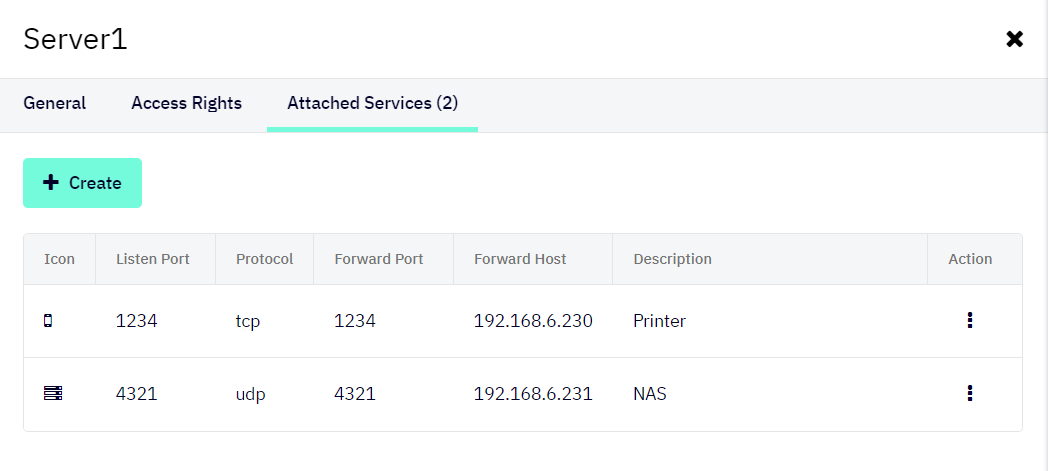
- Configure the attached service settings:
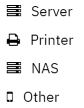
- Type - Select the attached service you are configuring: Server, Printer, NAS, or Other.
The Attached Services tab will display the corresponding icon to indicate the type of each configured service.
- Listen port - Define the port you want the service to run within the Shieldoo network.
- Protocol - Select the network protocol: TCP or UDP.
- Forward port - Define the port on which the service you want to connect runs on the server’s local network.
Shieldoo will map this port to the port defined by the Listen port setting. - Forward host - Define the IP address or hostname of the service you want to connect to.
- Description - Describe the attached service’s purpose.
- Type - Select the attached service you are configuring: Server, Printer, NAS, or Other.
- Click on the Save button to create the connection to the configured attached service.
- Learn how to connect to the prepared attached service in the Connect Me chapter.
For a specific example of connecting to an attached service, see the Sharing a Printer section.
Who can use attached services is governed by the same firewall rules as those that can be configured for servers.
For more information, see the Access Management chapter.